Replacing Acrylic Window
The front window of your Carvey is made from acrylic sheet. This acrylic provides protection from flying dust and debris that is generated during carving. Should this acrylic be damaged by impact or other stress, we recommend replacing the door to ensure safe carving. Get in touch with our support team if you need replacement parts.
Tools Required:
- 3mm Hex Key
Estimated Time: 15min
Step 1: Prepare
Shut down any active connection with Easel and unplug the USB cable from your computer and the Carvey. Power down the Carvey and unplug the AC power cable from the wall. Make sure that you have ample room to work in as you will be handling large parts of your Carvey. Since you will be working with small parts that are easily lost, it’s a good idea to have a small bowl or other container for bolts at your workstation.
Step 2: Remove Bottom Door Bracket
Open your Carvey’s main door. Locate the four bolts that secure the bottom door frame bracket on either side of the machine.
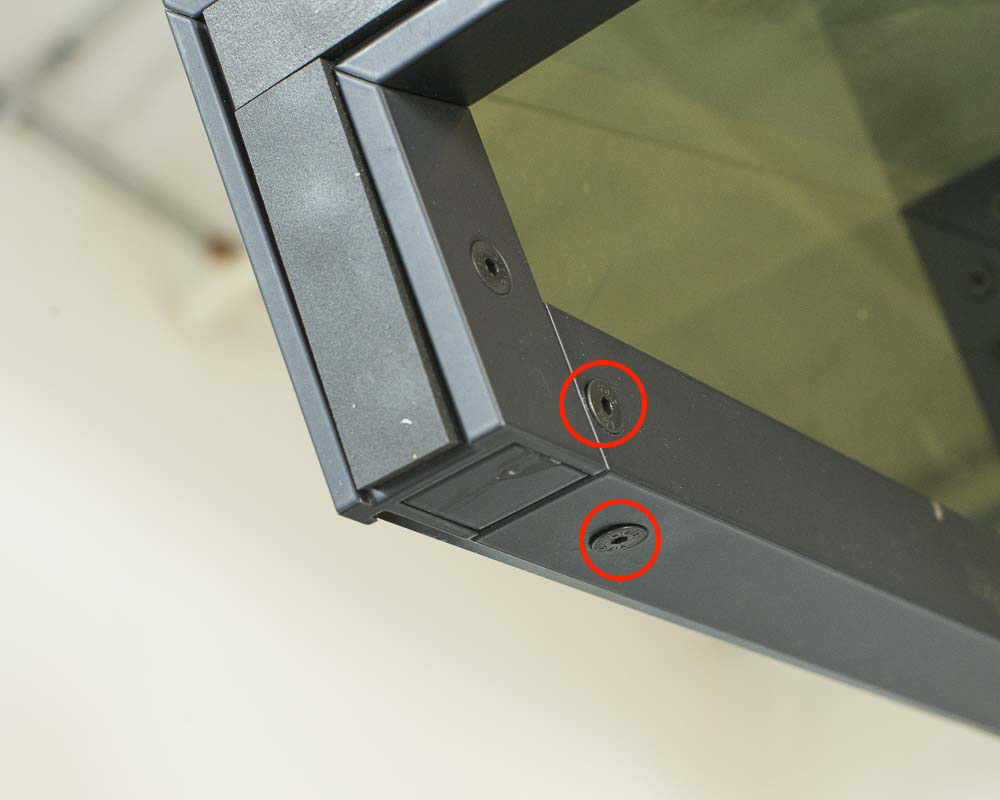 Use a 3mm hex key to loosen and remove these bolts.
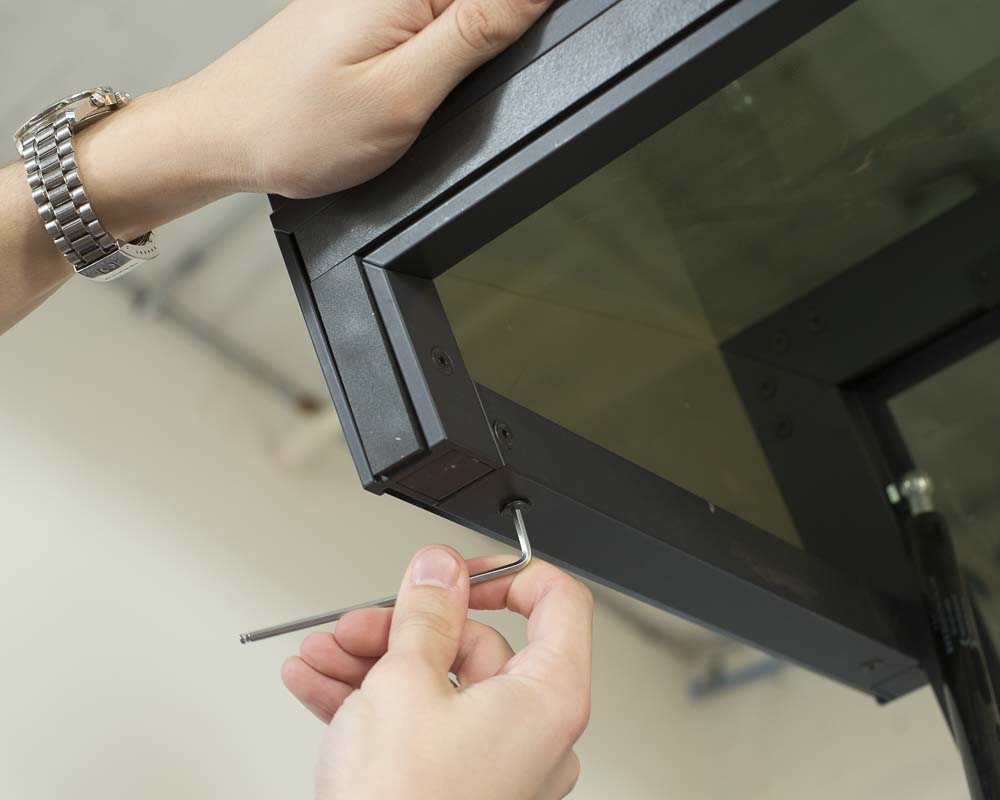 The bracket ought to stay in place even without bolts, but it’s good to keep one hand on the bracket during this step. Once the bolts are removed you can remove the bottom bracket by pulling it straight down out of the door frame.
If the bracket is sticking, lightly tap down on the front lip of the bracket with your palm or a rubber/rawhide mallet to disengage the bracket from the door frame and the acrylic. The acrylic is secured by a channel on the top of the bracket so take care not to stress the acrylic too much when removing or replacing the bracket. Set the bracket to the side.
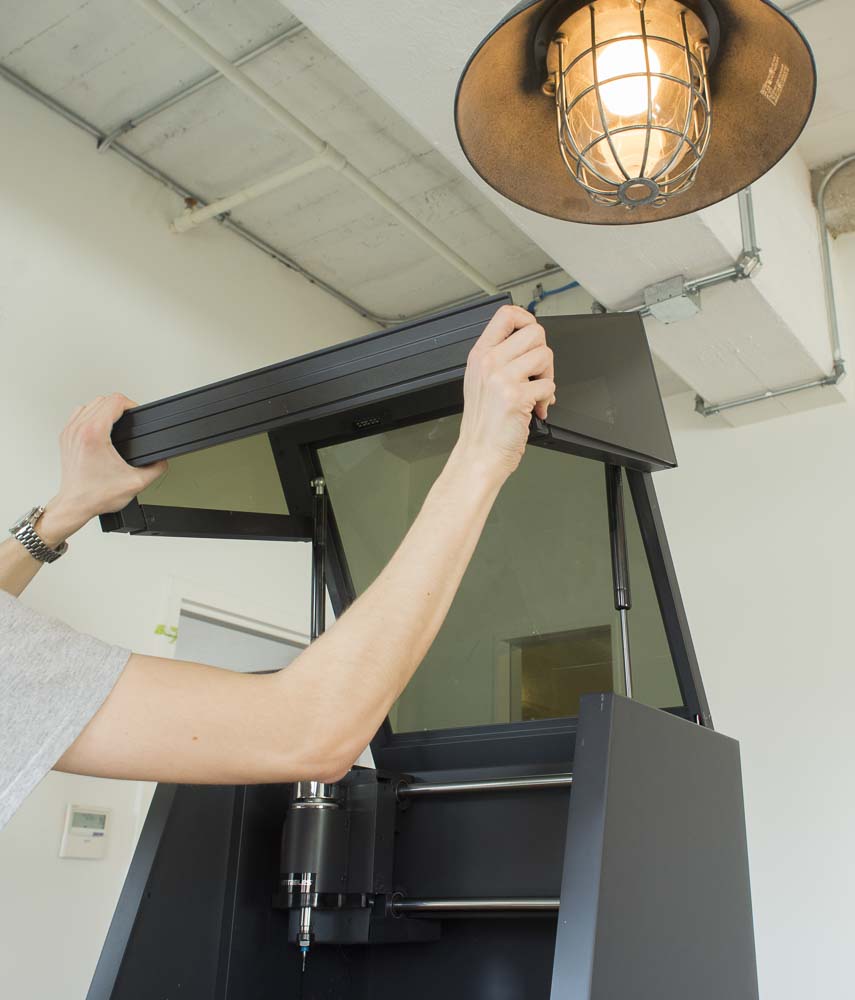
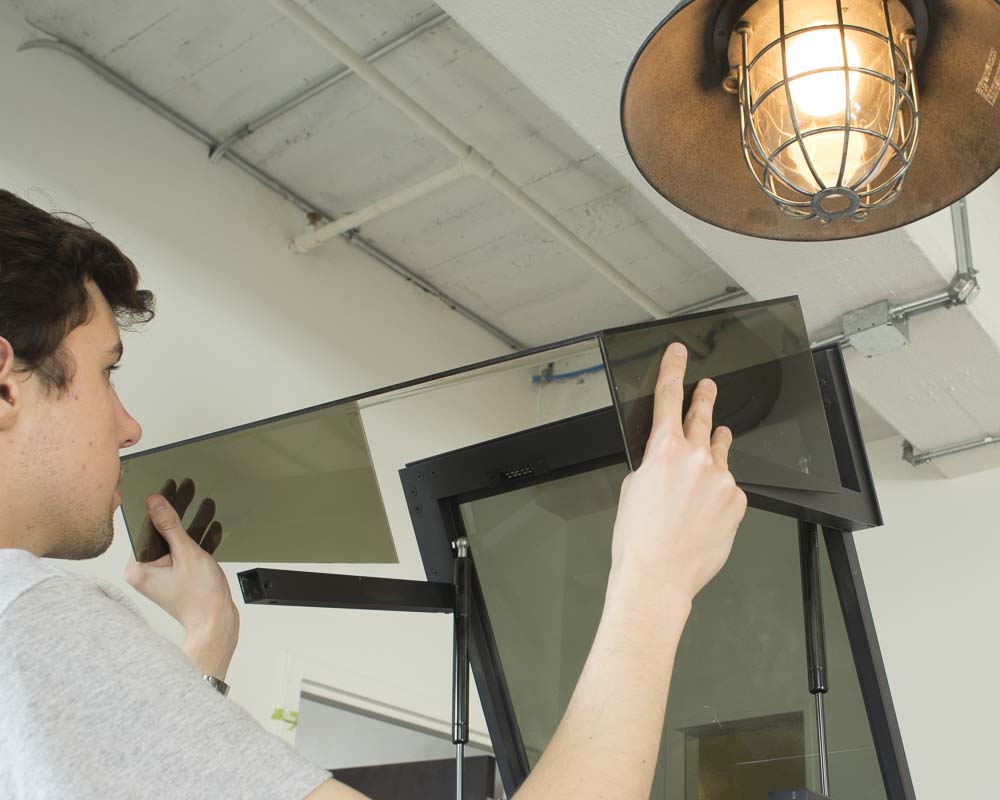
Step 3: Remove Acrylic Window
Like the bottom bracket, the top frame of the door has a channel that secures the front acrylic window. To remove this window, gently pull directly down relative to the top of the door. You may have to wiggle the window slightly to free it from the channel. Once the window is removed, set it to the side.
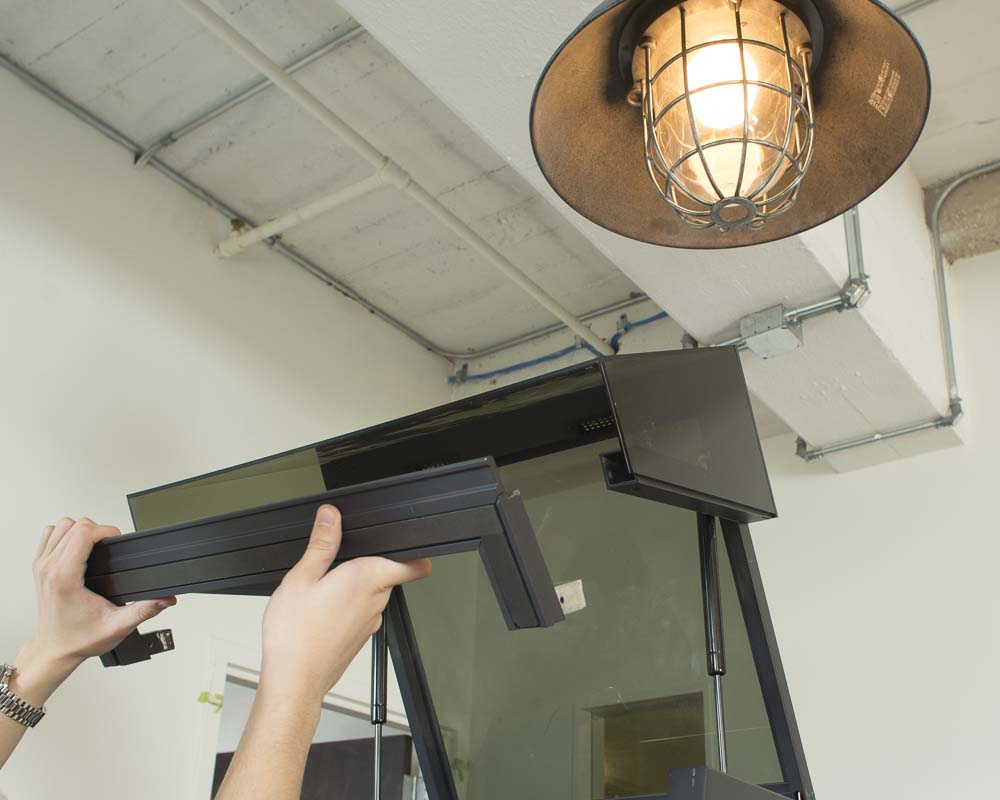
Step 4: Install New Window
First, remove any protective paper or plastic that may be present on your new window. Lift the window and place it over the main door frame. Slide the window up and make sure that it is properly seated in the top channel of the door. Use you palm or a mallet to gently persuade it into position if necessary. Once the acrylic is seated, replace the door’s bottom bracket, ensuring that the acrylic is seated properly in its channel. Use a 3mm hex key to secure the bracket with the four flat-head bolts. Your Carvey is now ready to go! Since it can be difficult to recycle acrylic, you can reuse or dispose of it as you wish, though it can be cut down for carving or laser-cutting.
Next Step: Smart Clamp